Friday, August 27, 2010

dresser revived.

I'm so so so so happy for this project to be over with but I must say it was ALL well worth it.  I love my new dresser and it adds the mid century modern touch to our bedroom that I've been looking for.  I bought the solid wood dresser off craigslist for $65 and put about 2 month's worth of  weekends sanding and painting into it (those paint layers take time!)  Here are some before and after pics. 
Before, well, after it was sanded (I forgot to take BEFORE before pics so this is what you get).  It even looks beautiful here as is - my opinion.

Before
After the first top painted layer (I got excited).
After.  And there she is... my beaut.  In our bedroom against the back wall.  Now I need to paint those walls...
After
After.  Opposite angle
After.  Here's a close up of the inverse stencil I did on the side which carries up over the top (that paint job was hell).
After. And probably my most favorite touch of it all... the label holders.  I bought some antique distressed label holders to go on the front of the drawers.  In my opinion, they totally top it off!
After.  We won't "mention" what's in THAT drawer... Oh, it's just my gutchies and braziers, come one people!


Until next post...

Sunday, August 8, 2010

Kitchen Makeover...

I know we've had it done for awhile now and I'm just NOW posting about it but better late than never, right? 
We decided that the smartest and most economic way to update our kitchen for the time being was a painting facelift to our cabinets.  I will say that I don't EVER want to do this job again.  It sounds sooo easy but all the tasks combined was pure torture!  We (well, I) decided to go with white because apparently it never goes out of style and before the kitchen was swimming in a sea of wooden darkness.  I love wood, but not THAT much. So, here are some before and after pics because I don't think my mom will stop bugging me until I post them on here ;)

Before - looking over the breakfast bar

Before - pic of kitchen desk (don't know why a desk was in here to begin with) and the pantry door.

Dave and his mom, Debbie, helping us remove cabinet doors during their visit.

Doors and drawers ready to be sanded, primed, painted and then painted again, and again...

The kitchen taped off, primed and screaming for paint

After - simlar view as before looking over breakfast bar (we were preparing for our LOST final episode party - those are palm tree toothpicks on top of the bar)

After - Kitchen desk

After - cabinet doors with painted stencil

After - Center cabinet doors above stove (kudos to sister Morgan for her help - love ya)

After - Dining room bar area and cabinets

After - Dining room window seat and bar area.

After - Kinda  overall shot (the space is awkward making it hard to get everything in one photo)

Now, onto the popcorn ceilings... to be continued...

1 year

It's been a whole year since we said our I Do's and the time has flown by.  I'm almost scared that the next 20 years will go by just as fast. Dave, being the sweetheart that he is, made plans for us to spend the weekend in Kerrville, TX, a small quaint town about an hour outside of San Antonio.  We stayed at a well-known inn where I think they had the best breakfast buffet I've been to in a long while ;-) We ate dinner the night before at Italian restaurant, Bella Vita, and ended the night at the hotel bar where a local country band played while we watched the retirees cut a rug on the dance floor - it was a great time.   Below are a couple pictures from our visit (mainly of Dave - I had the camera):
D recording the... scenery?


Photo op while walking a trail along the Guadalupe River
Might I add, while we were walking, a homeless (and perhaps drunk) man said to us, "Look at that! Two warriors still holding hands, I love it!" 

At the dam

Some hopeful fisherman AND woman, trying to snag some supper at the foot of the dam.

THE door that I tried my darndest to convince Dave was a great buy.  I talked the guy down to $40 and what I thought was a steal was the most stupid purchase Dave could imagine - I fell for his guilt trip BUT NOW I WISH I would have bought the damn thing!  No, I didn't know what I was going to make with it at the time but I know some other friends of mine would agree that something like this IS worth it... you know who you are ;-)


Tuesday, May 25, 2010

Before and After: Table from a friend...


I know, I know, it's been a long time since I've posted anything on here.  Dave and I have been busy painting our kitchen cabinets, trying to get them to a point where we could stand, and actually it's coming a long very nicely.  My sister, Morgan, came down last weekend and she helped me out with the stencilling on the doors... I'm not going to post pics yet only b/c I want to wait until the entire thing is complete!  This includes:
-painting over our laminate counter tops... that's right, PAINTING them :-)
-putting up a tile backsplash
-scraping off the popcorn ceiling
-adding new light fixtures
We have A LOT ahead of us but I cannot wait until it's all said and done! 

Until then, here is a before and after post to calm your taste buds...
About a year ago, my friend Colleen gave me a set of nesting tables that needed a little bit of work.  I took them on and it was only recently that I had the chance to make any progress.  There are two tables in all. Here are some before pics:


Top: The larger of the two tables
Bottom: The table that... "nests" under the top :-)
These pics are after I gave them a sanding.

As of now, I've only been able to refinish the larger of the two tables.  Here is it's after pics:


Amy Butler fabric spray mounted on top of table and framed with wood molding painted in chartreuse.  Mini aqua ball fringe around the bottom edge of the table for an added 'POP' of color. 

Whenever I do the smaller table, I think I might have to paint it a bright aqua to carry on the whimsy of the larger one. 

Wednesday, April 14, 2010

Labels: DIY

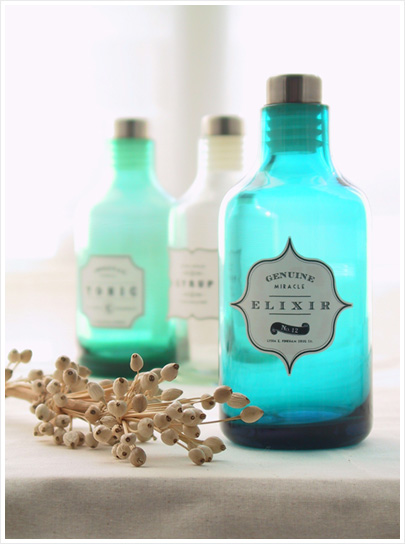
Today my sister, Morgan, asked me where I got the template for the labels on our wedding centerpiece carafes (old milk bottle-looking glass jars):

Sorry for the low-res. image

Anyway, it got me looking for the website and I ran into a bunch of other cool sites with other DIY labels.  If you're into unique details on the cheap, these are the way to go!  Just buy 8.5 x 11" label paper for a printer, and print away!


And of course, my favorite:

To download a free pdf of these apothecary jar labels (above), click here!

Morgan pointed out another cool site with decorative peel and stick labels: http://www.tapeswell.com/

Check it out!

Thursday, April 1, 2010

Burlap... it's not just for a sack of potatoes anymore!

For those of you who attended mine and Dave's wedding back in August, you probably realized how much I "appreciate" the fabric, burlap (I think I tried to use it everywhere I could).  It's cheap, it's all natural and it's rustic which is a great way to tone down elegance in a room and bring it to a more comfortable/casual level.  The mixing of these two styles (elegance and rustic) is what I vow to conquer!  I plan to do so in a future headboard project (no time soon, but it's on the list!).   Here are some examples of how burlap can be used to relax a room, whether it be an upholstered chair, pillow, bench, whatever!

Cute monogrammed burlap pillow cover


My favorite are the shoulder bags and the tufted cushion, I want that!

Ok, I can honestly see this in my bedroom somewhere ;-)  I love the reused white burlap sacs (with the  manufacturer's print left on them and all) decorating the upholstered burlap bench.  Actually, the bench looks more like linen (another favorite of mine)  This is true bliss!


Now for the headboard... I've researched all the DIY pages online on how to make one of these things but I'm betting it's a lot harder than it looks.  That's ok, maybe I can get Dave to help me out with this one ;-} I know I want a basic rectangle headboard but the kicker... I want to make it "tufted".  Yeah, I don't even own a sewing machine! But the good thing is, they say you don't need one for this project.  Here are some basic ideas of the type I'm going after, [picture it covered in burlap].


Here's a close-up of tufted burlap.  There's no way I'm going to mess with a button kit so maybe instead I can find some cute ornate (but not too flashy) buttons to add to the centers.

To learn how to make your own tufted headboard, click here!

Friday, March 26, 2010

One month later...

Well, it's been a month since we've been at our new home and things have come along a little.  No major changes yet, the popcorn ceilings will be the first thing to go but they'll have to wait a little longer.  This week and next we have friends and family visiting so I put my priorities on the guest bedroom and bathroom.  A little decorating never hurt, right?? ;-)  It gave me a good excuse to get things organized, boxes put away etc.  Here are a few pics of some new touches... it's all in the details!


Guest bedroom: new bed decor and decorative toss pillows (my favorite thing to buy)


Guest bath: Amy Butler hand towels from BB&B (love em!!) and weird little pom pom wood stems from Michaels in a vase from Homegoods.


"Book Origami": a little idea I found online of taking old books and folding the pages to create a 3-d shape (one book took about 2 hours - not bad for a unique craft project and a perfect example of taking something old and bringing it back to life in a whole new way).


Gramps!!  I love old pictures, especially those of my family.  This one in particular is my Grandpa Stone's senior high school photo (such a cutie!).  I have it on my mantle as a constant reminder of what a great man he was.  Mom, if you read this, I want more pics like this of the whole family so if you can help me out and scan me some, it would be much appreciated ;-)


Succulents!!!  Easy to care for plants that have some really cool details.  These are my favorites.


Master bedroom: Shabby Chic bedding from Target and some pretty pillows again!


Temporary side tables (I'll post pics of the birch tables as soon as I get some time to make them!)